We know you are already gearing up for the Zenless Zone Zero Aria banner in version 2.6 because this is where the hype is right now. As the ethereal lead vocalist of the Angels of Delusion, Aria brings a robotic idol flair to the battlefield as an S-Rank Ether Anomaly agent. Her kit revolves around generating “Light Sticks” to fuel devastating Level 3 Charged Attacks, triggering massive [Abloom] bursts on enemies with Attribute Anomalies. So, here is a Zenless Zone Zero Aria banner guide with pull value, best Aria builds, skill priorities, top teams and more. All details are accurate for the global server as of version 2.6.

And don’t forget to top up Zenless Zone Zero through Enjoygm because that is where you can have a high chance to pull her with enough resources. Discounted top up packs are there for you to grab so don’t forget to recharge before going with her.
Zenless Zone Zero Aria Banner Details (Neon Angel – Version 2.6 Phase 2)
ZZZ Aria debuts on the Neon Angel Exclusive Channel banner during version 2.6 Phase 2. This one is a limited-time event runs from March 4, 2026, at 12:00 (server time, UTC+8) to March 23, 2026, at 14:59 (server time). Phase 1 (Sunna) wraps up on March 4, so it is making this your window to guarantee her via pity carryover.
And these are the highlights of the Zenless Zone Zero Aria Aria banner
| Feature | Details |
| S-Rank Featured | Aria (50% chance on first S-Rank; guarantee next if lost) |
| A-Rank Rate-Ups | Seth, Anton (50% chance on first A-Rank; guarantee next if missed) |
| Pull Rates | S-Rank: 0.6%; A-Rank: 7.05% |
| Pity System | Soft pity ~66-75 pulls; hard pity at 80 pulls for S-Rank (limited banner). Pity shared across phases but resets per banner type. Standard Banner pity is 90. |
| Weapon Banner | Dazzling Choir (debuts Angel in the Shell – Aria’s signature; 75-pull pity, 75% rate-up for featured) |
| Cost | 1 Encrypted Master Tape = 1 pull (160 Polychromes); 10-pull = 1600 Polychromes |
Who is Zenless Zone Aria – Profile & Playstyle
Aria is an energetic android idol who hides her true robotic form using holograms. Behind the stage persona, she fills the Ether Anomaly role and is designed to deal heavy damage while staying active on the field.
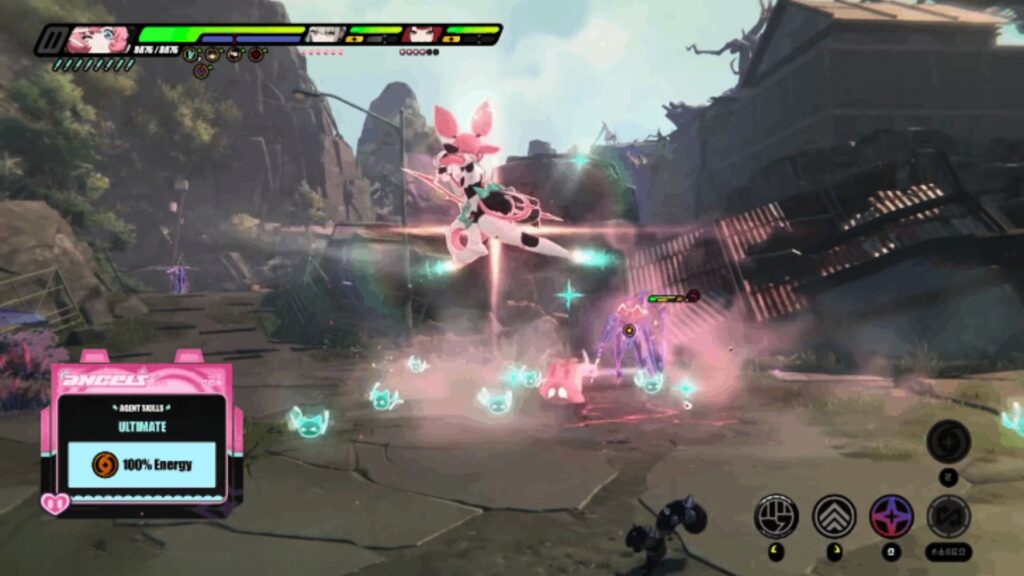
Combat of this character revolves around generating Light Sticks through normal attacks and EX Special skills. These Light Sticks instantly charge her plunging area damage Charged Attacks, which can be stacked up to Level 3. Reaching the highest charge level is key to unlocking her full damage potential.
Using her Ultimate places Aria in an Enhanced State known as Ether Veil. During this state, the entire team gains a 50% attack boost for 30 seconds. This window allows repeated use of highly empowered plunging attacks, turning Aria into a strong burst damage dealer. A major part of Aria’s kit comes from the Core passive Abloom. When a Level 3 Charged Attack hits, it triggers extra Anomaly damage based on Anomaly Proficiency. This damage becomes even stronger against enemies in a Weakened State, which also automatically applies Ether Anomaly to all enemies currently on the field.

Overall, Aria plays best as an on field hypercarry. The goal is to build Decibels and Energy quickly, stun enemies, and unload charged attacks during Ether Veil for maximum impact.
Best ZZZ Aria Build
Aria’s build should focus on boosting Anomaly damage, Energy generation, and Charged Attack consistency. Maximizing uptime on her Enhanced State and Level 3 Charged Attacks will result in the highest damage output.
Skill Upgrade Priority
Upgrading the right skills first makes a noticeable difference in performance. Core abilities should always be the top priority due to their direct impact on Abloom scaling and Anomaly damage. So the recommended upgrade order is as follows:
- Core Skill (★★★★★) – Abloom DMG
- Special Attack (★★★★★) – Light Stick gen + Energy
- Basic Attack (★★★★) – Light Sticks + combos
- Chain Attack / Assist / Dodge (★) – Situational
Aria Best W-Engines
If you want to boost Aria’s damage, then it is a must to go with W engines that enhances her power. Since most of her power comes from Abloom, the main focus should always be on Anomaly Mastery and Anomaly Proficiency. These stats directly increase the extra damage triggered by Level 3 Charged Attacks.

So, here is a clear breakdown of the strongest W Engines and why they work well for her kit.
| W-Engine | Why? |
| Angel in the Shell (Signature) | This is Aria’s best in slot option. It provides high base attack along with a strong boost to Anomaly Mastery. Additional effects grant a large increase to Anomaly Proficiency, bonus damage against enemies affected by Anomalies, and a temporary boost to all Anomaly damage after using Special or EX skills. Compared to other options, this engine delivers roughly 12 to 15% higher team damage, making it the strongest overall choice |
| Flight of Fancy | A powerful alternative that offers high base attack and a large amount of Anomaly Proficiency. Its passive effect increases Anomaly buildup rate and allows proficiency to stack when dealing Ether damage. This option works especially well in longer fights where consistent Ether application is important. |
| Weeping Gemini R5 (F2P Friendly) | One of the best free to play options available. While the base attack is slightly lower, it makes up for it with strong attack scaling and massive Anomaly Proficiency stacks. In teams that do not rely heavily on stun mechanics, this engine can reach around 85 to 90% of the performance of Aria’s signature weapon. |
| Electro Lip Gloss (A) | A solid early game choice that is easy to build around. It provides Anomaly Proficiency along with a small attack boost and increased damage against enemies affected by Anomalies. This makes it reliable for players who are still progressing or lack higher tier engines. |
| Fusion Compiler / The Brimstone | These options offer flexible stat bonuses through attack or mastery stacking effects. While not optimal for sustained damage, they can still perform well during burst windows and serve as temporary substitutes until better engines are available. |
Zenless Zone Zero Aria Best Drive Discs
A well suited set of Drive Discs define how consistently a Zenless Zone Zero Aria build can trigger Anomaly effects and scale Abloom damage. The ideal setup focuses on Ether damage, Anomaly Proficiency, and Anomaly Mastery to keep Level 3 Charged Attacks hitting as hard as possible.
The strongest combination uses a four piece bonus that enhances Ether damage and rewards both basic attacks and stun windows.
Best in slot setup here are:
Shining Aria four piece set paired with Phaethon’s Melody two piece set: The Shining Aria set increases Ether damage and grants Anomaly Proficiency after using Basic Attacks. When enemies are stunned, it also provides a large damage boost that lasts long enough to fully capitalize on Aria’s burst rotations. Phaethon’s Melody further strengthens the build by adding extra Anomaly Mastery, which directly improves Abloom scaling.
Alternative Options: Chaos Jazz two piece or Freedom Blues two piece sets can be used as substitutes. Both provide a flat boost to Anomaly Proficiency and work well if the best in slot pieces are not yet available.
Drive Disc Main Stat Priority
Each slot should be rolled with specific stats to support Anomaly focused damage.
| Slot | Main Stat |
| 1 | HP |
| 2 | ATK (flat) |
| 3 | ATK % |
| 4 | Anomaly Proficiency (~150-200) |
| 5 | Ether DMG % |
| 6 | Anomaly Mastery |
Substats Priority: Substats should always reinforce Anomaly scaling before anything else. Anomaly Proficiency should be prioritized first, followed by Anomaly Mastery and ATK %. Crit Rate and Crit Damage become valuable only at higher mindscape levels. Flat ATK remains the lowest priority but can still add minor value.
For smooth and fast Anomaly application, aim for around 400 to 500 Anomaly Proficiency. To maximize Abloom damage amplification, a similar range of 400 to 500 Anomaly Mastery is recommended.
Best Aria Teams & Bangboo
A perfect Zenless Zone Zero Aria build comes when paired with Stun and Support units that help generate Light Sticks faster and extend her burst windows. Teammates who boost Anomaly damage or enable frequent stuns allow Abloom to trigger at its full potential.

For Bangboo, Biggest Fan is the top choice. It provides faction based attack buffs that fit perfectly with Aria’s team compositions and overall damage goals.
And here are our best Aria teams recommendations:
| Team Type | Team | Synergy |
| Premium | Aria / Sunna / Lycaon | Sunna buffers Anomaly/Ether; Lycaon stuns for Abloom/25% DMG. |
| Premium | Aria / Sunna / Yuzuha | Double Angels buffs (ATK/Anom DMG); 20-35% team uplift. |
| F2P | Aria / Nicole / Qingyi | Nicole groups/DEF shred; Qingyi stuns for Disorder. |
| Alt | Aria / Vivian / Yuzuha | Vivian sub-Anom; Yuzuha amps buildup. |
| Physical Flex | Aria / Billy / Sunna | Billy AoE Anom trigger; faction bond. |
Aria Rotation
- Setup: Start by letting teammates apply Anomaly effects, such as Nicole using her EX Special. Switch to Aria and use Basic Attacks up to four times or a Special skill to generate Light Sticks and Energy.
- Burst: Activate EX Special to generate three to six Light Sticks. Absorb them to reach a Level 3 Charged Attack, then plunge to trigger Abloom damage.
- Ultimate: Use the Ultimate to enter the Enhanced Ether Veil state. While active, spam Level 3 Charged Attacks. Supercharged Light Sticks add extra charge levels, making it easier to maintain constant pressure.
- Stun Window: When enemies are stunned, additional Light Sticks are generated. This is the best moment to unleash maximum Abloom damage and benefit from the 25% damage bonus.
- Loop: Swap out to refresh ally buffs or apply stuns, then return to Aria to maintain the 30 second Ether Veil uptime. Always prioritize Level 3 Charged Attacks, as they provide invulnerability and resistance to interruption during execution.
Aria Prefarm Materials
Preparing materials in advance makes leveling Aria much smoother once she is unlocked. So here is a clear breakdown of everything needed for promotion, core skills, and full skill upgrades, along with where each material can be farmed.
Promotion (Lv. 60)
| Material | Amount |
| Controller Certification Seal | 30 |
| Denny | 800,000 |
Farm: Combat Simulation stages that drop Assault Gunner cards are the primary source for these promotion materials.
Core Skill Upgrade Materials (A-E)
- Notorious Hunt Mat x9
- Expert Challenge Mat x60
- Denny x405,000
Skill Tree Materials (All Skills to Level 12)
| Material | Amount |
| Specialized Ether Chip | 250 |
| Hamster Cage Pass | 5 |
| Basic/Adv Ether Chip | 100 total |
| Denny | 2,505,000 |
Farm: Combat Simulation stages featuring Ionized Farbauti provide the required Ether Chips and related materials.
Drive Discs: Ether Plating Agent x150 (HIA Club/Scott Outpost Sims).
Is Aria Worth Pulling?
Aria is a strong pull for players who focus on Anomaly based gameplay or run Ether focused teams. As the first true Ether Anomaly damage dealer, she brings something completely new to the roster. Her strength comes from Abloom, which scales directly with Anomaly Proficiency and becomes even stronger when enemies are in a Weakened State. At high proficiency values, this bonus damage ramps up quickly, making her especially powerful in Disorder team compositions.
This character shines most when paired with proper buffers and stun enablers. Teams built around Ether Anomaly will see a noticeable damage increase, particularly during burst windows where Level 3 Charged Attacks are used repeatedly.
However, skipping Aria can make sense in certain situations. If Sunna is not available, her overall performance drops since Sunna is her strongest support option. Players who mainly enjoy Physical or Electric focused teams may also find better value waiting for a unit that fits their preferred meta.
Pro Tip for Pulls: Polychromes from events add up quickly, and version 2.6 alone provides more than 200 free pulls through limited time activities. Saving these early gives a solid foundation before banners go live. For players who plan to top up and want to reach pity faster without overspending,Enjoygm is a practical option. It offers discounts on Monochrome top ups with instant delivery, making it easier to secure Aria and her weapon before the banner phase ends.

Conclusion
And that is all for the Zenless Zone Zero Aria banner. Now that you know what to do with the Zenless Zone Zero build and how to work with it to the best, it is time to get in, prepare yourself and unleash the best damage in the battles.
