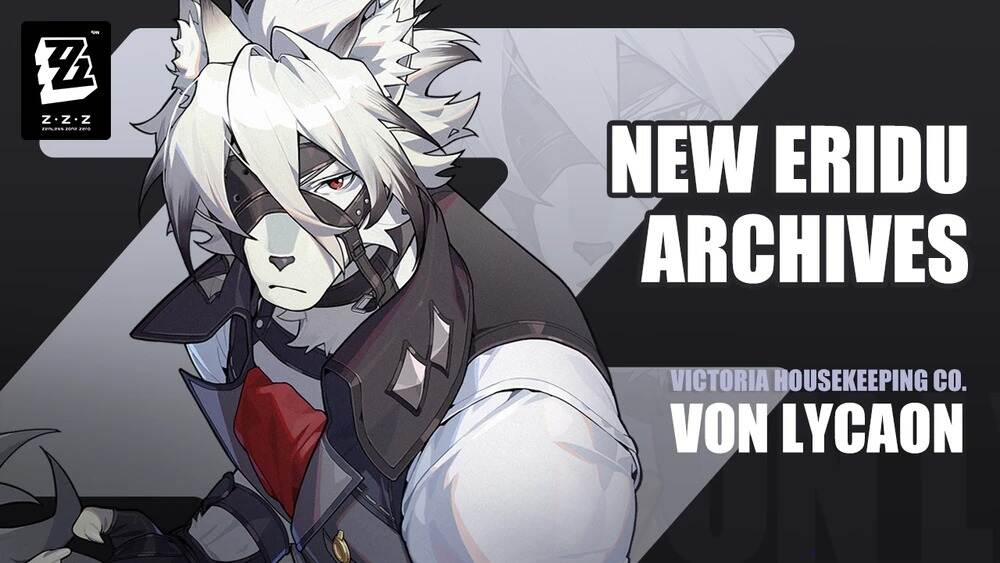
A member of section 6 with an amazingly interesting skill kit and an upcoming buff, Harumasa makes his return with amazing new abilities and effects in Zenless Zone Zero. In this guide, we will go over how players can optimize Harumasa’s damage output with the best weapons, drive discs and more for his brand new buff.
Get your hands on this newly improved archer from Section 6 in Zenless Zone Zero today with the help of Enjoygm!


Harumasa Skill Kit & Playstyle Analysis
General Introduction
Harumasa is a S Rank Agent of the Electric Element and Attack Specialty. He specializes in dealing massive amounts of Electric damage to enemies as quickly as possible in quick succession whenever an enemy is inflicted with the Stunned status or is inflicted with the Electric Anomaly Effect. He is a very simple but effective critical based main DPS character for the Electric team with an amazingly fun playstyle.

Skill Analysis & Leveling Priority
 | Basic Attack: Deal Electric damage to enemies. The 5th hit generates 2 Electro Quivers. Enhanced Basic Attack: Deal Electric damage to enemies. The 5th hit generates 6 Electro Quivers. Hold Basic Attack: Enters aiming mode, when hitting enemies, consume Electro Quivers on the field to apply a Mark on enemies. |
| Leveling Priority: High | |
| Basic Attack | |
| Reason: Harumasa wants to weave basic attacks into his on field combo, so to optimize his damage output, players should level this up. | |
| Special Attack: Deal Electric Damage to enemies. EX Special Attack: Deal increased Electric damage to enemies and generates 6 Electro Quivers on the field. Enhanced EX Special Attack: After performing certain attacks, can chain into Ex Special Attack to unleash multiple instances of Electric damage to enemies, generating 6 Electro Quivers on the field. When this enhanced attack hit an enemy, consume Electro Quiver to trigger the effect of Hold Basic Attack, marking the enemy. | |
| Leveling Priority: High | |
| Special Attack | |
| Reason: Increasing the level of this helps to boost Harumasa’s overall damage output. | |
| Chain Attack: Takes the field and deals Electric damage to enemies. Generates 6 Electro Quivers. Ultimate: Unleash a powerful attack towards the enemies, dealing powerful Electric damage in a wide area. Afterward, deal an additional instance of AoE Electric damage to enemies in an area. | |
| Leveling Priority: High | |
| Chain Attack & Ultimate | |
| Reason: Increasing the level of this helps to boost Harumasa’s overall damage output | |
 | Dodge: Dodge the enemies attacks. Dodge Counter: Dodge the enemies’ attacks and deal electric damage to them. Dash Attack: When there’s a marked enemy on the map, enter a special enhanced state and quickly approach the enemy. When in this enhanced state, Harumasa can deal continuous damage to the marked enemy, dealing Electric damage to them based on the amount of Electro Quivers consumed when applying the mark status on enemies. The more stacks are present, the more attacks he can do. Harumasa gains increased interruption resistances and takes less damage from enemies in this state. |
| Leveling Priority: Highest | |
| Dodge | |
| Reason: Harumasa’ main damaging move is are his Dash Attacks, so this need to be level up as a priority to max out his damage output. | |
 | Defensive Assist: Parries the enemies attacks, raising their Daze meter. Assist Follow Up: Parries the enemies attacks and counter, dealing Electric damage to them. |
| Leveling Priority: Low | |
| Assist | |
| Reason: Leveling this up doesn’t improve Harumasa’s damage too much, so players should only level this up if you have materials. | |
| Core Skill: The CRIT Rate of Dash Attack: Hiten no Tsuru – Slash, Chasing Thunder, and Ultimate increase by 25%. When Harumasa’s Dash Attack: Hiten no Tsuru – Slash/Ultimate triggers a critical hit against an enemy, he gains 1/6 stacks of Gleaming Edge. Dash Attack: Hiten no Tsuru – Slash can grant a maximum of 3 stacks per activation, and Gleaming Edge can stack up to 6 times, lasting 5s. Repeated triggers reset the duration. Each stack of Gleaming Edge increases the CRIT DMG of Dash Attack: Hiten no Tsuru – Slash, Chasing Thunder, and Ultimate by 12%. Additional Ability: When another character in your squad is a Stun or Anomaly character:When Harumasa’s attacks hit Stunned enemies or enemies under Attribute Anomaly, his DMG increases by 40%. When Harumasa’s Falling Feather hits Stunned enemies or enemies under Attribute Anomaly, it will apply 2 stacks of Electro Prison to the target. Potential: When activating an [EX Special Attack], [Chain Attack], or [Ultimate], increases ATK by 12%. [Dash Attack: Hiten no Tsuru – Slash] and [Chasing Thunder] ignore 15% of the target’s Electric RES for 12s. Repeated triggers reset the duration.Extends the duration of [Gleaming Edge] in [Core Passive] to 10s. | |
| Unlock Priority: Highest | |
| Core Skill, Additional Ability & Potential | |
| Reason: Unlocking all of these should take priority as it massively improves the damage output and stats Harumasa gets. | |
Playstyle Guide & Rotation
Harumasa’s main gimmick lies in his special Electro Qivers effects, which can be generated by himself or allies whenever the enemies are inflicted with the Stunned status or with the Electric Anomaly Shock Status.
Harumsa’s main gameplay lies in his dash attacks, which allows him to deal amazingly powerful enhanced attacks when there are Electro Quivers on the field. When inflicted with the Shocked status or when enemies are stunned, 6 Electro Quivers will be generated onto the field. By consuming 2 Quivers at a time, Harumasa can quickly mark an enemy and instantly approach them using his hold Basic Attack. In this state, his basic attacks are infused with Electric element, are considered Dash Attacks, and are massively enhanced, allowing him to do extremely high damage to enemies. By consuming more Quivers, Harumasa can continuously use these enhanced basic attacks against enemies. The more enhanced basic attacks he uses in succession, the more critical damage he gains and the more damage he does.
To generate Electro Quivers himself, Harumasa can use his Skill and EX Skill, which allows him to generate Electro Quivers on the field. Finally, the cap off his damage combo, players can unleash his Ultimate, dealing massive amounts of Electric damage to enemies and allow him to switch off the field swiftly. Harumasa wants to do this combo as quickly as possible while the enemy is stunned, allowing him to take advantage of the enemies’ stun damage modifiers to finish them off or do massive amounts of damage before switching out.
Harumasa Best In Slot W-Engines
As an extremely pure Main DPS carry character, Harumasa needs weapons that can boost his Critical Stats, Attack stats and improve his overall damage output with their passive effects.
Harumasa Best W-Engines Choices
Some of Harumasa’s Best W-Engine Choices are:
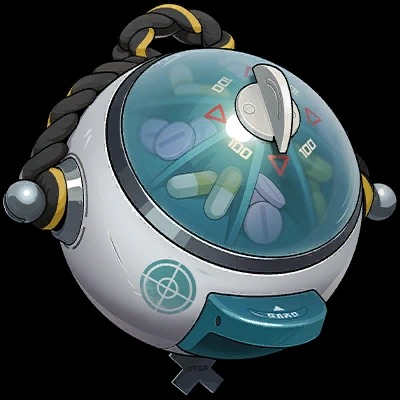 | 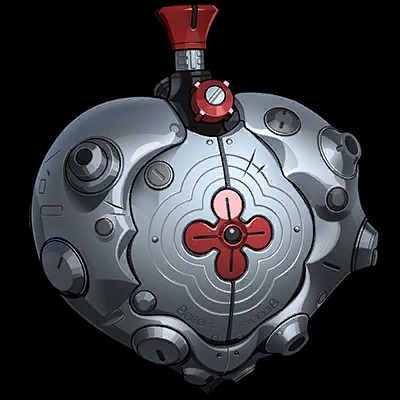 | 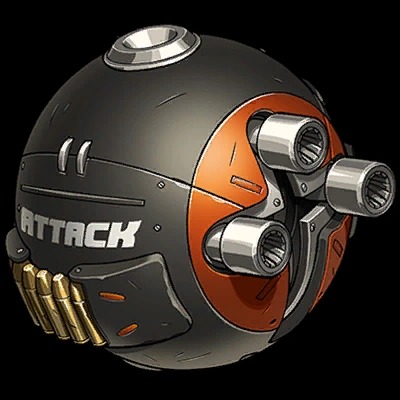 |
| Zanshin Herb Case | Cordis Germina | Cannon Rotor |
| Limited 5* W-Engine | Limited 5* W-Engine | Battle Pass 4* W-Engine |
| Main Stat: 713 Attack |
| Sub Stat: 48% Critical Damage | |
| Zanshin Herb Case | W-Engine Rating: Best Premium W-Engine |
| Effect: CRIT Rate increases by 10%. Dash Attack Electric DMG increases by 40%. When any squad member applies an Attribute Anomaly or Stuns an enemy, the equipper’s CRIT Rate increases by an additional 10% for 15s. | |
| Explanation: Harumasa’s signature W-Engine and his best in slot weapon as it massively improves his damage output and provide him with an incredible amount of Critical stats. | |
| Main Stat: 713 Attack |
| Sub Stat: 24% Critical Rate | |
| Cordis Germina | W-Engine Rating: Best Alternative |
| Effect: Increases CRIT Rate by 15%. When the equipper deals DMG with a Basic Attack or EX Special Attack, they gain 1 stack of a buff. Each stack increases the equipper’s Electric DMG by 12.5%, up to 2 stacks. Each stack lasts 40s. The duration of each stack is calculated separately. Can trigger once per use of a skill. At 2 stacks, the wearer’s Basic Attack and Ultimate DMG ignore 20% of enemy DEF. | |
| Explanation: Harumasa’s best alternative weapon that massively boost his critical rate and electric damage output while also allowing him to ignore a portion of the enemies defenses. | |
| Main Stat: 594 Attack |
| Sub Stat: 20% Critical Rate | |
| Cannon Rotor | W-Engine Rating: BP Alternative |
| Effect: Increases ATK by 7.5%. Landing a critical hit on an enemy will inflict an additional 200% of ATK as DMG. This effect can trigger once every 8s. | |
| Explanation: The BP alternative for Harumasa that offers him a boost in critical rate and attack. | |
Prepare your funds in advance to get the best W-Engines for Harumasa with the help of Enjoygm Zenless Zone Zero Top Up – the safest top up option today!
Harumasa Best Drive Discs Builds & Stats
Harumasa Best Drive Discs Set
The best drive disc sets for Harumasa are the 4pcs Shadow Harmony, which boost his dash attack damage and enhances his critical and attack stats when hitting enemies with dash attacks. For the other 2 piece, players should use the Branch & Blade Song set to boost Harumasa’s Critical Damage.
 | Shadow Harmony |
| 2-pc: The DMG of Aftershocks and Dash Attacks is increased by 15%. | |
| 4-pc: Upon hitting an enemy with an Aftershock or Dash Attack, if the DMG dealt aligns with the equipper’s attribute, the equipper gains 1 stack of a buff effect, at most once per use of a skill. For each stack, the equipper’s ATK increases by 4%, and CRIT Rate increases by 4%. The effect can stack up to 3 times and lasts for 15s. Repeated triggers reset the duration. | |
 | Branch & Blade Song |
| 2-pc: CRIT DMG +16% | |
| 4-pc: When Anomaly Mastery exceeds or equals 115 points, the equipper’s CRIT DMG increases by 30%. When any squad member applies Freeze or triggers the Shatter effect on an enemy, the equipper’s CRIT Rate increases by 12%, lasting 15s. | |
Harumasa Best Main Stats & Sub Stats
As a main DPS Hypercarry, Harumasa wants your typical Offensive stats like Critical Stats, Attack and Electric Damage Bonus.
His preferred stats are as followed:
| Drive Disc | Main Stats |
| #4 | Critical Rate or Critical Damage |
| #5 | Electric Damage Bonus% |
| #6 | Attack% |
| Priority | Sub Stats |
| 1st | Critical Damage |
| 2nd | Critical Rate |
| 3rd | Attack |
Important Stat Threshold:
– Players should focus on boosting Harumasa’s Critical Damage over Critical Rate as the majority of his stats, weapon passives and even his drive disc provide a hefty amount of free Critical Rate. Aims for the usual 80% critical rate stat and invest everything else into critical damage.
Harumasa Best Teams
Harumasa’s best team revolves around characters that can provide him with amazing damage buffs while quickly stunning the enemies, helping him to generate Electro Quivers quickly and allowing him to deal powerful damage against the enemies before switching out.
Harumasa Hypercarry Team
 |  |  |
| Harumasa | Dialyn | Astra Yao |
| Main DPS | Sub DPS | Support |
| Essential | Flexible | Flexible |
Main DPS: Harumasa is the team’s main DPS character that takes the field immediately whenever the enemies are stunned, allowing him to quickly consume Electro Quivers to deal damage to enemies in quick succession and finish them off while being buffed by others.
Sub DPS: Dialyn is the team’s preferred Stun Agent as she can quickly stun the enemies with her skill kit while also providing Harumasa with different buffs and allow him to do a free Ultimate upon taking the field, helping to optimize his damage output. Other stunners can also work in this place like Von Lycaon, Qingyi, etc.
Support: Astra Yao is the preferred Support character in this position, buffing Harumasa’s critical damage and overall damage output while allowing him to switch onto the field much more efficiently. Other support characters can be slotted into this spot including Alexandrina, Lucy, etc.
Conclusion
Get your hands on this newly buffed up Harumasa and turn him into one of the game’s strongest Electric DPS characters with the help of Enjoygm Zenless Zone Zero Special Discount Top Up Deals today!